


As Halloween creeps closer, pumpkin carving quickly becomes a must-do for everyone of us! For Minecraft fans, turning pumpkins into cool pixelated designs inspired by the game adds a fun and creative spin to the spooky season.
And guess what? It’s also a golden opportunity for businesses to join in the fun, attract attention, and promote their brand. Whether you’re a small shop or a big company, Minecraft-themed pumpkin carving can help you engage your audience, boost foot traffic, and show off your creativity.
So, let’s get into how you can get started with some Minecraft-inspired pumpkin carving, and how you can use it to market your business with customized Halloween products!
Step-by-Step Guide to Carve a Minecraft Creeper Face for Halloween
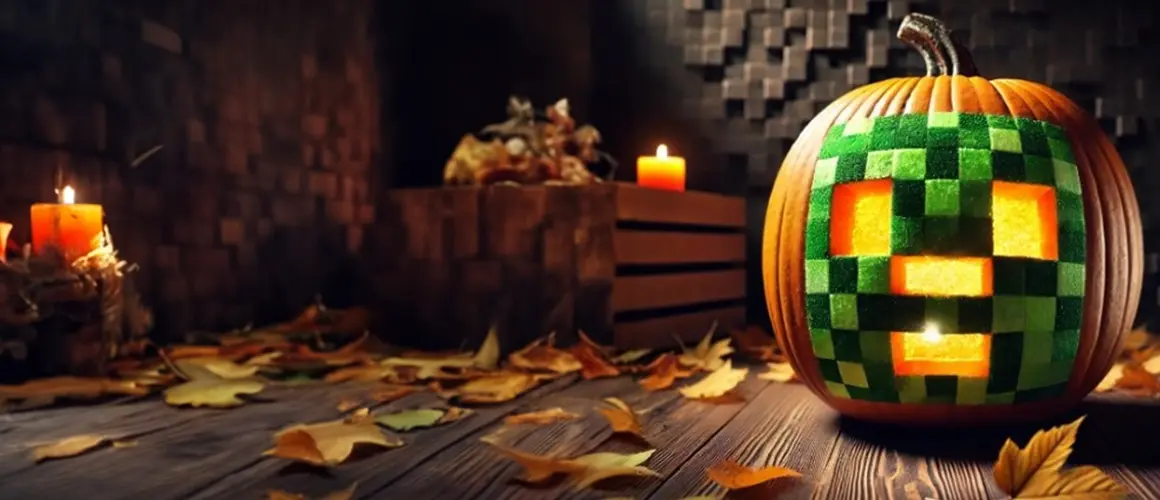
This guide will walk you through the step-by-step process of carving a Minecraft Creeper face, one of the most iconic designs in the game, and provide tips on how to promote your pumpkin patch or business using these designs for Halloween marketing.
Step 1: Gather Your Materials
Before you start, make sure you have all the tools and materials needed for both carving and displaying your pumpkin:
- Pumpkin: Choose a medium-sized pumpkin with a smooth surface for detailed work.
- Pumpkin Carving Kit: Essential tools include a serrated saw, scraper, poking tool, and smaller detail tools.
- Minecraft Creeper Template: You can find Creeper face templates online or print a pixelated image from the game for easier carving.
- Tape: To attach the template to the pumpkin.
- Neon Signs/Decor: Use accessories like Halloween Neon Signs or Ghost Inflatable Tube Men to create an eye-catching display for your business.
- Lighting: LED lights, glow sticks, or small candles for illuminating the finished pumpkin.
Step 2: Prep Your Pumpkin
- Cut Open the Top: Start by cutting a circle around the stem at the top of the pumpkin. Be sure to angle the knife slightly toward the center to create a lid that won’t fall through once the carving is done.
- Scoop Out the Insides: Use a large spoon or the scooper from your pumpkin carving kit to remove all the seeds and pulp. Scrape the walls as clean as possible, especially in the areas where you’ll be carving. The thinner the wall, the easier it will be to cut through later.
Step 3: Transfer Your Creeper Design
- Attach the Template: Take your printed Creeper face template and tape it securely onto the flattest part of your pumpkin. Make sure it’s positioned exactly where you want the design to appear.
- Trace the Design: Use a poking tool to make small holes along the lines of the template, transferring the Creeper face design onto the pumpkin. Make the dots about 1/8-inch apart to clearly mark the design, which will serve as your guide when carving.
Step 4: Carve the Creeper Face
- Start with Larger Cuts: Using a serrated carving tool, begin by cutting along the largest shapes in the design, which for the Creeper face are usually the large square eyes and mouth. Start from the middle of the shape and carve outward, working slowly and carefully.
- Move to Smaller Details: Once the larger shapes are carved out, use smaller, more precise tools to refine the details of the Creeper face. Minecraft designs often involve clean, straight lines, so keep your movements controlled.
- Remove Carved Sections: Push the pieces you’ve carved out from the inside, removing them cleanly. If the pieces don’t fall out easily, use the tip of the saw to gently lift them away.
Step 5: Add Lighting – To bring your Creeper pumpkin to life:
- Insert Lighting: Place LED lights, glow sticks, or small candles inside the pumpkin. Avoid regular candles if you’re concerned about fire hazards.
- Position Neon Signs: For an extra pop, set up one of our Halloween-themed neon signs, like the Happy Halloween Neon Sign or Trick or Treat Neon Sign, near your display to give it that special glow. The neon lights will enhance the pixelated nature of the Minecraft design and draw attention to your creation.
Step 6: Promote Your Pumpkin Patch or Business

Now that your Minecraft pumpkin is complete, here’s how to market your pumpkin patch or business, attracting attention and maximizing your Halloween sales:
Create a Social Media Buzz: Post your Creeper pumpkin on social media platforms like Instagram, Facebook, and TikTok. Use hashtags like #MinecraftPumpkin and #HalloweenPumpkin to reach a wider audience. Encourage customers to share their own Minecraft pumpkin designs and offer a discount for the most creative ones.
Decorate with Branded Products
- Banners for temporary Halloween attractions: Use eye-catching custom Halloween banners to announce your pumpkin patch’s special Minecraft-themed event or display.
- Halloween PVC Foam Board Signs: Set up durable PVC foam board signs around your location to provide information and create a festive atmosphere.
- Pop-up shop Halloween banners: Create Pop up shops and hang colorful Halloween canvas banners to add charm to your patch, making it an inviting place for families.
- Halloween Yard Signs: Strategically place Halloween yard signs to direct traffic and highlight different pumpkin carving stations.
- Vinyl Decals: Enhance the overall decor with Halloween wall lettering or vinyl decals featuring Halloween-themed Minecraft characters.
- Incorporate Inflatable Tube Men: Use an inflatable tube man, like the skeleton or ghost tube man, near the entrance of your pumpkin patch to grab the attention of potential customers passing by. These dynamic figures are a fun and noticeable way to drive traffic to your location.
- Create a Pumpkin Carving Contest: Host a pumpkin carving competition where customers can showcase their Minecraft-themed designs. Offer prizes like custom Halloween mugs or neon signs to winners. Promote the contest with seasonal banner advertising for Halloween, including Halloween step and repeat banners, and capture photos to share online, increasing engagement.
Step 7: Share the Experience
Once you’ve set up your display and marketing strategy, encourage visitors to snap photos of your Minecraft-themed pumpkins and share them online. Offer discounts or promotional codes to customers who tag your business on social media, helping spread the word about your pumpkin patch and increasing customer engagement.
By combining the timeless fun of pumpkin carving with the popularity of Minecraft, and adding visually striking decorations like neon lights and tube men, you can create a standout Halloween experience that attracts customers and drives sales. Start carving, promote creatively, and watch your pumpkin patch thrive!
- Written by BestOfSigns Editorial Team
 Posted in